
Welcome to FundiBill!
Firstly, thank you for choosing us.
Whether you’re a plumber, freelancer, electrician, consultant, photographer, landscaper or running your own small business, you’ve just taken one of the biggest steps towards spending less time on paperwork and more time growing your business.
The best part?
You can have your entire account set up in less than 10 minutes.
Let’s get started.
Before You Begin
Before creating your first invoice, you’ll need a few things handy.
Don’t worry if you don’t have everything yet, you can always come back and update it later.
You’ll need:
✅ Your business name
✅ Your email address
✅ Phone number
✅ Business address (optional)
✅ Company logo (optional but recommended)
✅ Your brand colours
✅ Banking details
✅ VAT Number (if applicable)
Once you’ve got those ready, you’re good to go.
Step 1: Create Your FundiBill Account
Already signed up? Skip to Step 2.
Click on Get Started in the header to go to the signup page.
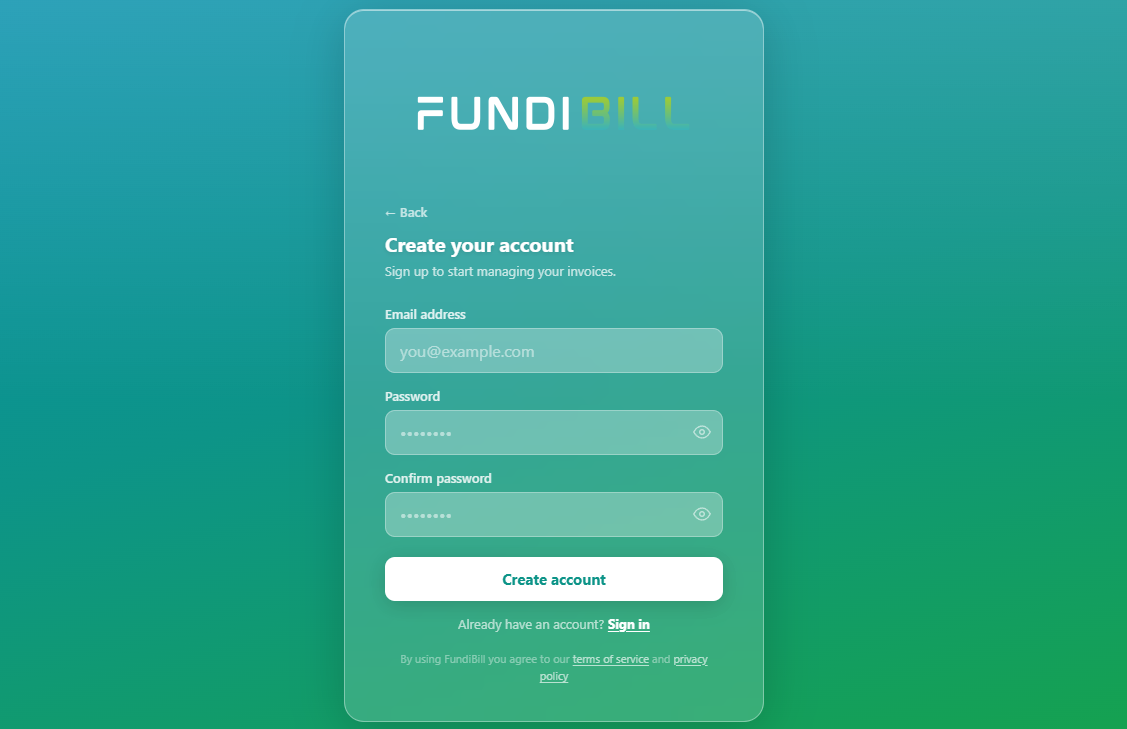
Complete the following:
- Email Address
- Password and confirm your password
Once you’ve registered, you’ll receive an email from us to verify your email, click on the button to simply login to your FundiBill dashboard with the email and password you created.
🎉 Welcome aboard!
Step 2: Complete Your Business Profile
This is one of the most important steps because the information entered here automatically appears on every invoice and quote you create.
Navigate to:
Settings → Business Profile
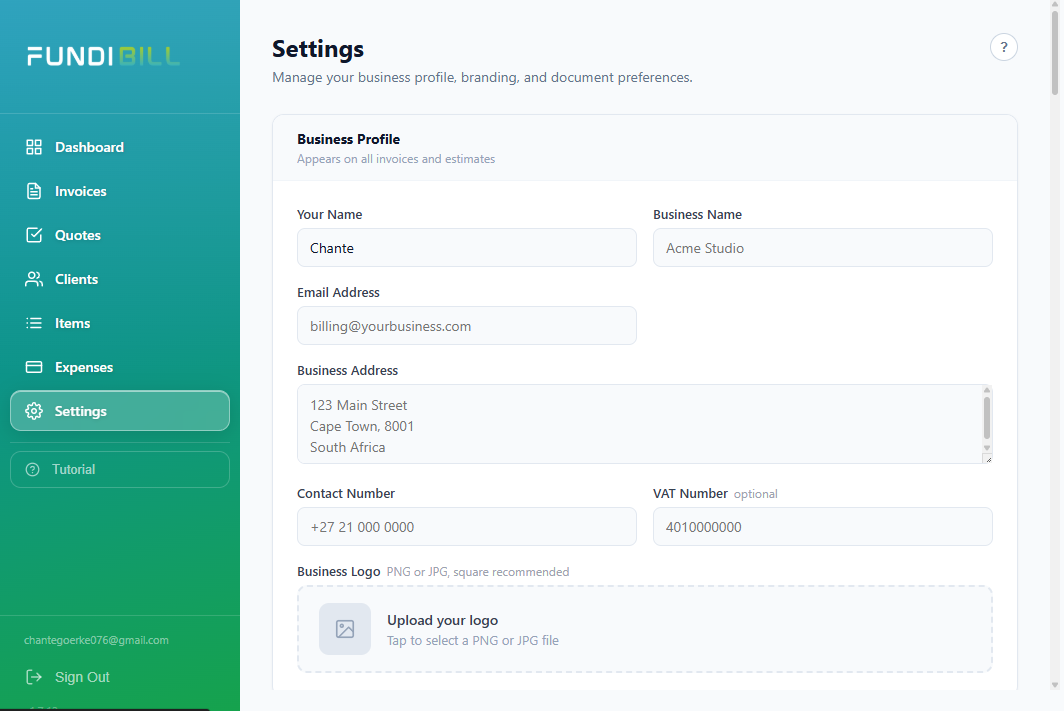
Complete the following fields.
Your Name:
Here you will enter the person representing the business or running the accounts.
Business Name:
Enter your business / company name. We recommend to enter your business name as per your registered CIPC documents, example: Fundi AI Pty Ltd.
Email Address:
Enter your business email here. If you have an accounting department, we recommend to add that email instead of a normal “info@yourcompany.co.za”.
Business Address:
Complete your company’s address in the field provided, if you do not have an address yet – leave it empty.
Contact Number:
Enter your company’s contact number or the person to handle any billing enquiries.
Make it easy for customers to reach you if they have questions.
VAT Number:
If you’re VAT registered, enter your VAT number here.
If you’re not VAT registered, simply leave this blank.
Upload Your Logo:
A logo instantly makes your invoices look more professional. Don’t have one yet? No problem. You can always upload one later.
Your logo will be displayed on your invoices, quotes and as an email header when sending out your documents to your clients.
Customize your Invoices & Quotes
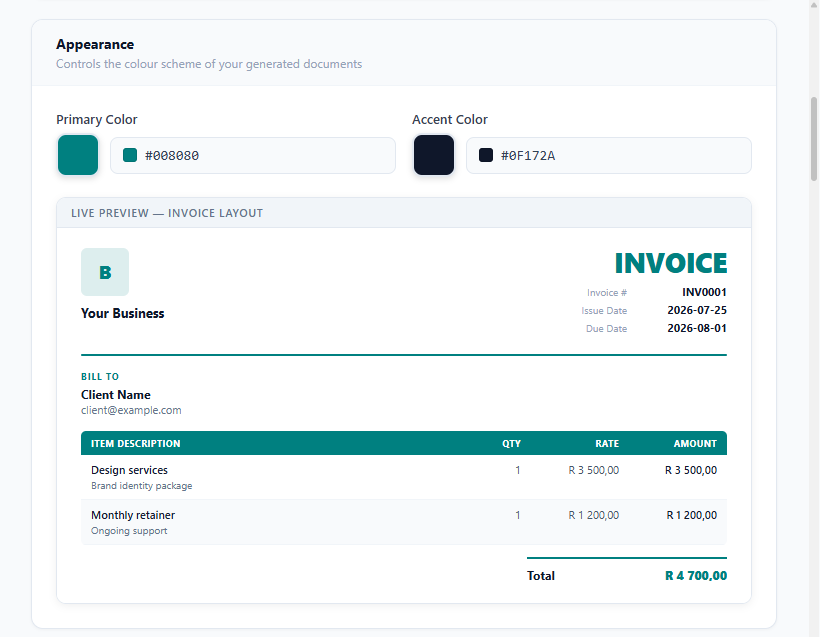
Set up Document Settings
Enter how you’d like your invoice or quote prefixes to appear on your documents. This will automatically calculated and add up as you create new invoices or quotes.
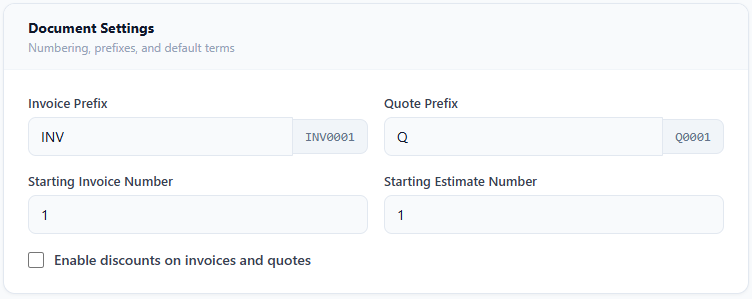
Already have a few invoices or quote numbers? Have it start from your preferred number so your books can balance.
Step 3: Add Your Banking Details
Customers can’t pay you if they don’t know where to send the money.
Go to:
Settings → Business Profile
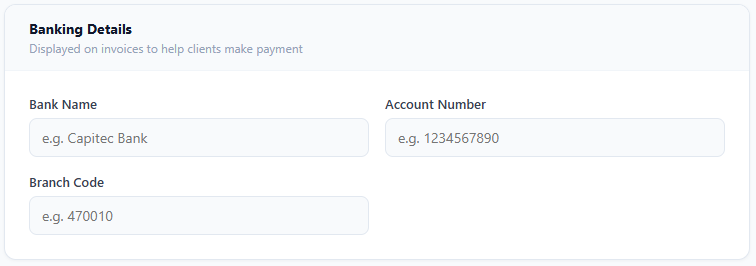
Add your:
- Bank Name
- Account Number
- Branch Code
Double-check everything before saving. A single incorrect digit can delay payments.
Step 4: Notifications & Messages
Setup your messages and notifications for sending invoices and quotes to your clients in your own style and tone, set it up once and use it on repeat.
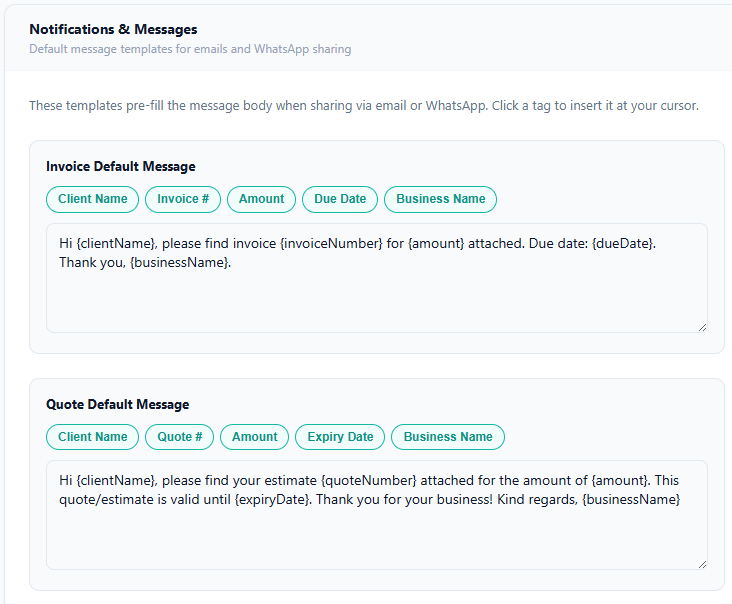
Click on the coloured pills beneath the headings to automatically add personalization to your invoices and quotes. Every invoice or quote you send via WhatsApp or email will be pre-filled with the clients’ information.
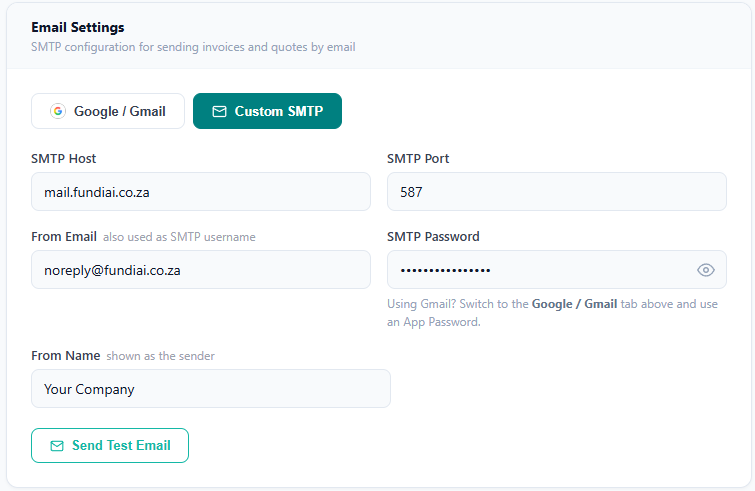
Step 5: Setting up your email
Send your invoices and quotes with a branded or personal email in a few easy steps. Invoices and quotes automatically adds your logo to the email header for a more professional look.
Google / Gmail
Sign in directly with your google account, very easy, in just a few steps.
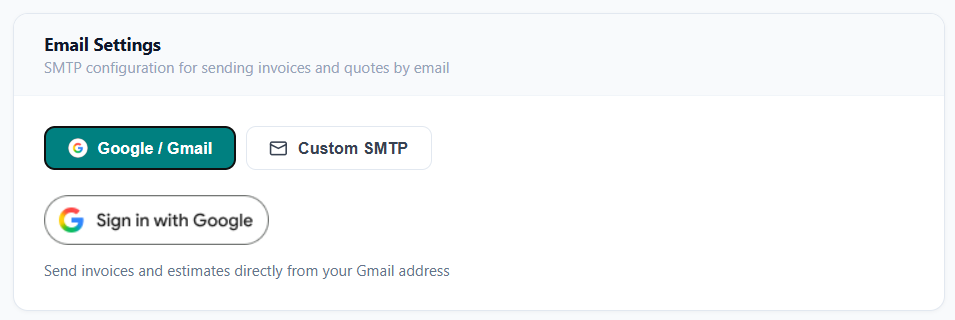
Tick the send email on your behalf option. This is the only authorization required to send invoices and quotes from your gmail account.
SMTP Email Setup
SMTP Host:
Enter your host’s email that was provided by your email administration / provider, example: mail.yourcompany.co.za
SMTP Port:
Enter the port number as per your email administration / provider.
example: 587
From Email:
Enter your email username, example: info@yourbusiness.co.za
SMTP Password:
Complete with the password as provided by your email administration / provider.
From Name:
Enter your Business name. This will appear as the main title in the inbox mailing list. example: Your Business.
Step 6: Payment & Reminders
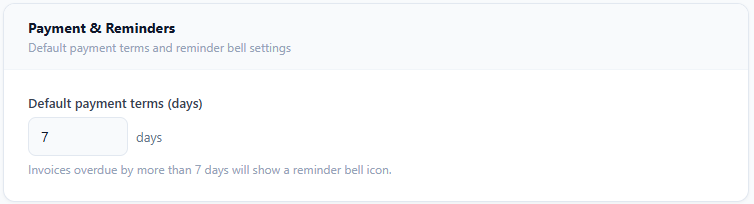
Setting up your payment and reminders is super simple. Simply select the amount of days after an invoice is due for payment. A little bell icon will appear on the invoice so you can send the reminder to your client if you wish.
Step 7: Terms & Conditions
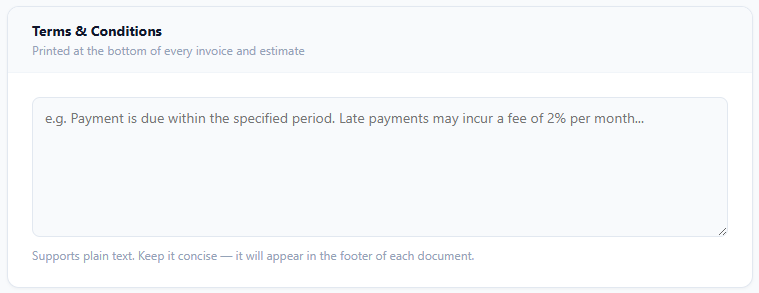
Set up your business terms & conditions easy, this will automatically be added to every invoice and quotes when sending to your clients.
Step 8: Add Your Products or Services
If you regularly invoice for the same work, this step will save you loads of time.
Go to: Items
Click: + Add Item
Example:
Garden Service
Price: R450
Description: Weekly Garden Maintenance
Or
Website Design
Price: R3,500
Description: Professional Business Website
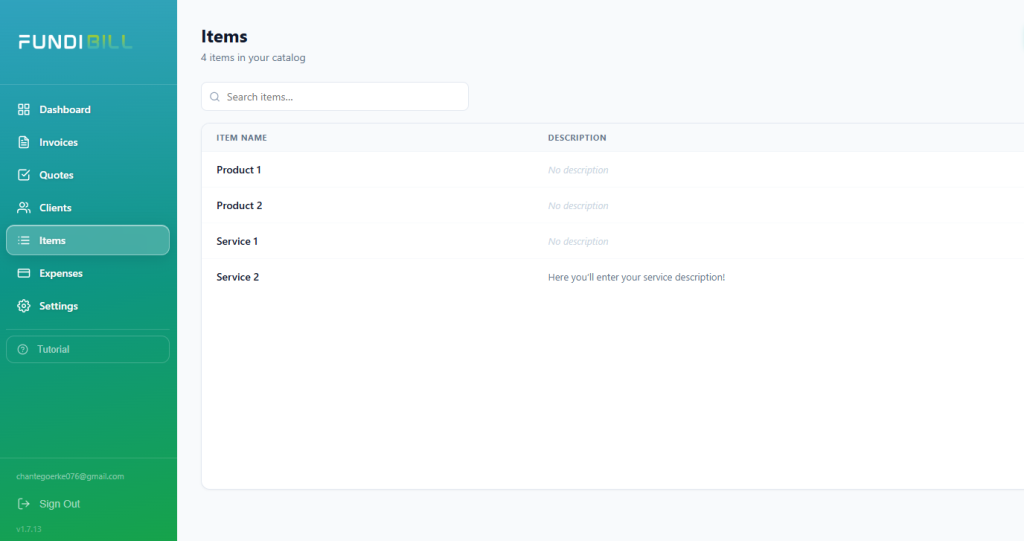
You can add as many products or services as you like.
We recommend to make your description as detailed as possible so your clients knows exactly what they will be paying for.
Example:
Service: Pedicure
Description: Foot soak, Foot scrub, Foot Mask, Massage and cream included.
Next time, simply click and select them. No more typing everything from scratch.
You can simply add from an invoice and it will store automatically in your items list so you can use it quicker the next time.
Step 9: Create Your First Invoice
This is where the magic happens.
Navigate to: Invoices
Click: + New Invoice
Now complete the following.
Choose Your Client
Select the client you created earlier. If they’re new, you can create a customer directly from the invoice screen.
Add Products or Services
Click: Add Item
Start typing and a list of your products / services will be displayed from a drop down list. Choose one of your saved services.
Or create a custom item by entering the information as you prefer.
Example: Website Design
Quantity: 1
Price: R3,500
Check the Total
FundiBill automatically calculates your invoice total.
No calculator needed. No spreadsheets. No maths mistakes.
Add Notes (Optional)
This is a great place to write something like:
Thank you for your business!
or
Payment appreciated within 7 days.
Small touches like this leave a great impression.
Step 10: Review Everything
Before sending your invoice, quickly check:
✅ Customer Name
✅ Invoice Number
✅ Products / Services
✅ Prices
✅ Total
Taking 20 seconds to review your invoice can save hours later.
Step 11: Send Your Invoice
Happy with everything?
Click: Share / Send Invoice
You can now send it directly to your client via WhatsApp or from the email you have set up earlier. Uses the pre-filled settings from Notifications and Messages (Step 8).
Congratulations!
🎉 You’ve officially created your first FundiBill invoice.
Track Your Invoice Status
One of the best parts about FundiBill is staying organised.
Instead of wondering: “Did I ever send that invoice?”
You’ll always know.
Your invoices can be tracked as:
🟢 Draft
📤 Sent
✅ Paid
⏳ Overdue
This makes following up much easier.
Keep Growing Your Customer List
Every new customer you add makes invoicing even faster.
Soon you’ll simply:
Select Customer
↓
Select Service
↓
Send Invoice
Done.
That’s exactly how invoicing should be.
Pro Tips to Get Paid Faster
Creating invoices is only half the battle. Getting paid quickly is the goal.
Here are a few tips from our FundiBill Team:
Send Your Invoice Immediately
The sooner you invoice, the sooner customers usually pay.
Use Clear Descriptions
Instead of: Labour
Write: Installed outdoor security lighting including wiring and testing.
Include Payment Terms
For example: Payment Due Within 7 Days or Payment Due Upon Receipt
Customers appreciate clear expectations.
Keep Customer Details Updated
An incorrect email address means your invoice may never arrive. Always update customer details if they change.
Common Questions we get
Can I edit my business information later?
Absolutely.
Simply go back to Settings and update your information whenever needed.
Can I change my logo?
Yes.
Upload a new logo at any time, go to Settings then scroll down to the Upload Logo section from your Business Profile.
Can I create invoices from my phone?
Yes!
FundiBill is designed to work wherever your business takes you.
Whether you’re in your office, on-site with a customer or grabbing coffee, your invoices are always just a few taps away.
How long does setup take?
Most businesses are completely set up in under 10 minutes but with FundiBill it is even quicker – averaging around 5 minutes.
You’re Ready to Go!
That’s it. You’ve successfully set up FundiBill.
From now on, creating invoices becomes incredibly simple. Select your customer. Add your services. Send your invoice. Get paid.
Running a business is hard enough. Your invoicing shouldn’t be.